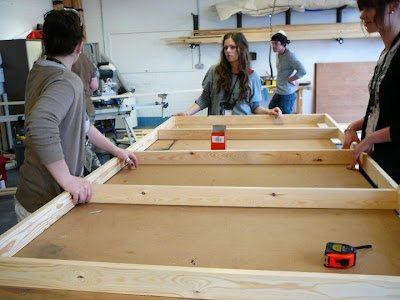
Before we could begin to construct the 8x4’ flats we had to be shown how to make them with Henry.
We started by taking 8’ pieces of wood and cutting them up into 5 4’ pieces, with an additional 2 widths of wood off the ends. We then took 2 pieces of 8’ wood and placed the 4’ pieces evenly along them in order to brace our flats. These bits were drilled into place making sure we marked certain ends so we knew we were keeping the flats flush. These were made accurate by the use of set squares and tape measures. We had to be careful not to split the wood when we drilled it, if this happened we had to remove the screws and redo it above or below the previous hole. We had to start at one end and make our ways across to the other ends in order to keep the wood flush, this would take quite a few of us to achieve this.
Once the frame was successfully fitted together we could apply the plywood skin. The surface of the frame was covered in PVA glue. The skin was then lined up with the frame and placed on top. An air pressure nail gun was used to secure the skin to the frame. This bit was really difficult because if the frame wasn’t exactly flush then we had stress the wood and try and pull it over so it fit the edges nicely. Nails were also punched in through the middles of the skin where the support braces were and this was done by measuring where they were underneath using a piece of wood. If the skin turned out to be too big for the frames we could remove them with the wood router. When using the router it would take two people, one to controlling the router and another to be close by with a vacuum to remove the large quantity of sawdust from the air quickly. Goggles and dust masks were required.


No comments:
Post a Comment